
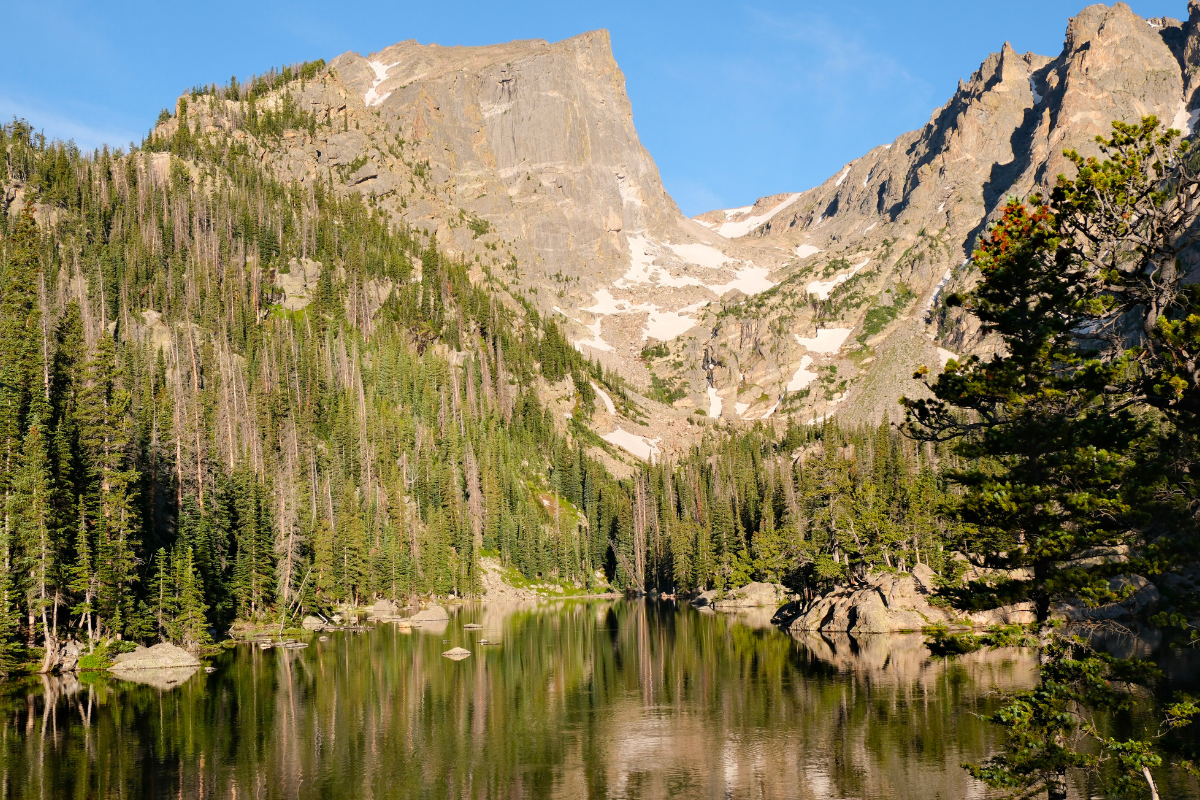
If you only have one day in Rocky Mountain National Park, this is the best 1 day itinerary we recommend. This itinerary includes the most popular hike in Rocky Mountain National Park, the trail to Nymph, Dream, and Emerald Lakes, plus the less crowded but equally stunning Lake Haiyaha. We parked at the Bear Lake Trailhead before sunrise and hiked our way through Nymph, Dream, and Emerald Lakes before scrambling up to the turquoise waters of Lake Haiyaha.
Before heading out, we stopped at Bear Lake right at the trailhead for one last view of the mountains. After the hike, we stopped in Estes Park to explore the charming downtown and grab a bite before capping the day with a drive over Trail Ridge Road, the highest continuous paved road in the United States.
We did this trip over 4th of July weekend as part of a family Colorado road trip, staying in a Vrbo on the west side of the park near the Grand Lake entrance. We also spent time exploring Colorado Springs during the same trip, which you can read about in our Pet Friendly Colorado Springs Guide. But this itinerary works any time during peak season and is one of the best ways to experience Rocky Mountain National Park if you are short on time.
To be honest, this trip was one of the moments that changed everything for us. Being surrounded by the mountains, breathing in that air, and realizing how alive we felt on the trail planted the seed that eventually led to our move to Colorado. If you have ever stood at the top of a hike and thought “I could live here,” you will understand exactly what we mean.
Planning Ahead: Timed Entry Reservations
Rocky Mountain National Park requires timed entry permits during peak season. For this hike, you specifically need the Timed Entry + Bear Lake Road permit to drive your vehicle to the Bear Lake Trailhead. Without it, you can still access the trailhead by parking at the Park and Ride lot and taking the free shuttle, but having the permit and parking at Bear Lake gives you the most flexibility, especially for an early start.
For 2026, this permit is required between 5 AM and 6 PM daily from May 22 through October 18. Reserve through Recreation.gov as early as possible. Bulk reservations open on the 1st of each month at 8 AM MDT for the following month, and remaining spots are released the night before at 7 PM MDT. I literally had alarms set on my phone for the monthly release because these sell out within minutes. Do not wait.
A timed entry reservation costs $2 per vehicle and is separate from the park entrance fee ($30 for a 1 day vehicle pass, or free with the America the Beautiful Annual Pass). The Timed Entry + Bear Lake Road reservation covers the entire park for the day, including Trail Ridge Road, so one reservation handles everything on this itinerary.
Pet Note
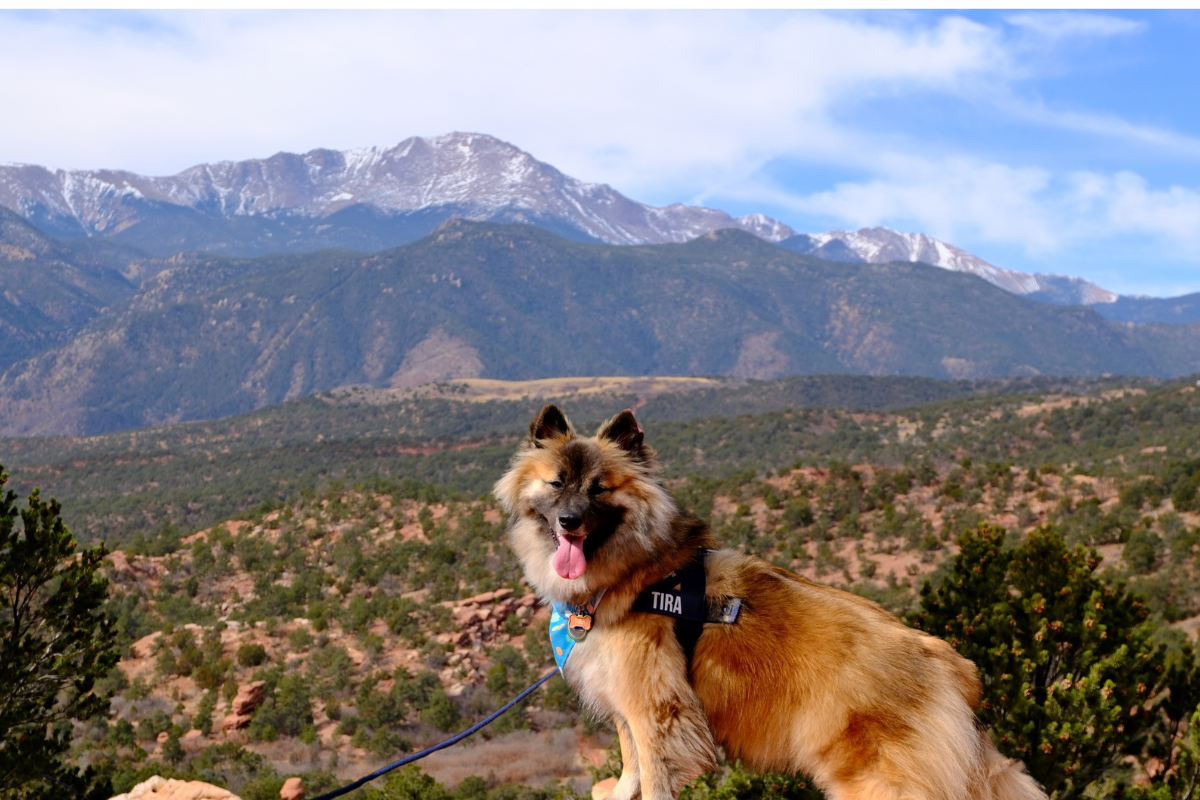
This is one trip Tira sat out. Dogs are not allowed on any trails within Rocky Mountain National Park, including the Bear Lake corridor. Tira stayed with his grand pawrents at our Vrbo while we tackled the hike. If you are traveling with your dog, plan accordingly. We know this is a dealbreaker for some and wanted to be upfront about it.
Our Early Morning Start – Bear Lake Trailhead
We left our Vrbo on the west side of the park around 3 AM and drove through Trail Ridge Road in the dark to reach the Bear Lake Trailhead. Driving Trail Ridge Road that early meant we got a preview of the route before our afternoon drive back, and even in the dark the winding mountain road felt like an adventure of its own. We started the hike at 5:49 AM and scored parking right at the Bear Lake lot, a huge win since this lot fills up fast, even with timed entry in place.
We will be honest: we thought we were early enough to catch the sunrise, but the sun was already coming up by the time we hit the trail. If you truly want to be at Nymph or Dream Lake for sunrise, you need to be parked and on the trail closer to 5:30 AM. Set your alarm and do not negotiate with it.
Even starting just before 6 AM, the trails were noticeably calmer than what we saw later. There were already hikers on the trail and cars in the lot, but the pace felt relaxed and we had plenty of space to enjoy the views without feeling rushed. The morning light was soft, the temperatures were cool, and the energy on the trail felt easy. By the time we were heading out around 10 AM, the trails were packed. We passed a steady stream of hikers heading up as we were coming down. Starting early is not just a suggestion for this hike. It is the single best thing you can do for your experience.
Where to Stay for This Itinerary
Your base determines your morning. Here is how each side of the park works for this hike.
West Side: Grand Lake or Fraser
This is what we did. Staying on the west side means you can drive Trail Ridge Road as part of your route and experience both sides of the park in one day. The tradeoff is an earlier wake up call to reach Bear Lake by sunrise.
East Side: Estes Park
Staying in Estes Park means a shorter drive to the Bear Lake Trailhead, making it much easier to arrive before sunrise. It is the closest town to the park entrance with plenty of hotels, cabins, and vacation rentals.
Camping Inside the Park
RMNP has several campgrounds on both sides of the park. Glacier Basin and Moraine Park are on the east side near Bear Lake Road. Timber Creek is on the west side near Grand Lake. Sites book up months in advance during peak season, so plan ahead.
Reserve your site on Recreation.gov
The Hike: Nymph, Dream, Emerald, and Haiyaha Lakes
The Hike at a Glance
Total Distance
~5.2 miles
Elevation Gain
~1,115 ft
Difficulty
Moderate
Time
3 to 4 hrs, ours took ~4.5
Trailhead
Bear Lake
Dogs Allowed
No
Use this trail map on AllTrails for the exact route.
The hike starts from the Bear Lake Trailhead on a well maintained path that climbs gradually through thick forest. In about half a mile, we reached Nymph Lake. It is a small, calm lake, and during summer it is covered in lily pads. We caught a reflection of Hallett Peak on the water in the early morning light that made the short walk completely worth it.

Tyndall Creek
Between Nymph Lake and Dream Lake, the trail crosses over Tyndall Creek via a wooden bridge. When we visited in early July, the creek was rushing down the rocks with enough force that it looked and sounded like a waterfall. It was one of those unexpected moments that made us stop and just take it in before continuing up.

Past Nymph Lake, the trail gets steeper with some beautiful openings along the way where you can look out over the valley. If you visit in late July or early August, this stretch has wildflowers. Dream Lake sits just over a mile from the trailhead, tucked beneath the walls of Hallett Peak and Flattop Mountain. It is widely considered the most photographed lake in Rocky Mountain National Park, and once you see it you will understand why. It is narrow and beautiful, and you can see Tyndall Glacier high up in the saddle between the peaks feeding the water below.

From Dream Lake, it is another 0.7 miles to Emerald Lake. This is the steepest section of the hike with rocky terrain and some boulder hopping. We reached Emerald Lake around 6:45 AM and the timing could not have been more perfect. The water was completely still, reflecting the mountains like a mirror. Emerald Lake has this incredible blue green color from glacial minerals that makes it feel almost unreal. This ended up being our favorite lake of the entire hike. We took a short break to soak it all in before heading to our last lake.

After backtracking to the junction between Nymph and Dream Lakes, we turned onto the Lake Haiyaha Trail. This is where the hike gets more adventurous. The trail climbs through forest and then opens up to a boulder field where the defined trail basically disappears. There are no markers, so you will need to use your best judgment to find your way through the rocks and pick a spot to settle. It was the most challenging part of the hike, but it is totally manageable and adds a fun sense of adventure.

We hiked this trail with my sisters, four of us total, and Lake Haiyaha is where we finally sat down for a proper break. And by proper break we mean a full lunch spread on the boulders: chicken nuggets, rice (because if you are Filipino, you are bringing rice on a hike, no exceptions), birria tacos my sisters and I made the night before, and whatever other random snacks we pulled out of our bags. It was the most random combination of food but honestly it tasted incredible after all that hiking. Trust me, save your lunch for this spot.
The water ranges from deep green to turquoise depending on the light and time of day. When we visited, it had a green tint in the morning light. The lake is surrounded by massive boulders with the rugged peaks of Chaos Canyon behind it. Fewer people make it to Haiyaha since most hikers turn around at Emerald, so it felt quieter and well earned.

And if you are brave enough, you can swim in it too. We saw a group of guys jumping into the water while we were eating lunch. Based on the sounds they were making, it was freezing, but they did not seem to mind.
Since the hike starts and ends at the Bear Lake Trailhead, you will pass right by Bear Lake on your way back to the car. We stopped to take in the views but were too tired to walk the full loop after four lakes. If you still have energy, the 0.6 mile trail circles the lake on mostly flat packed gravel with views of Hallett Peak and Longs Peak. It is wheelchair accessible and takes about 20 minutes. Either way, at least stop and see it before you leave.

Trail Conditions: Expect Snow and Mud, Even in July
Even though we visited over 4th of July weekend, there were still patches of snow on parts of the trail, especially on the stretch to Lake Haiyaha. Some sections were muddy and slippery from snowmelt. This is completely normal at this elevation, even in midsummer. Trekking poles help significantly on these sections. Wear shoes with good traction and do not be surprised if you are stepping through mud and snow in the middle of summer. It is part of the experience at 10,000+ feet.

Dealing with the Elevation and Hiking Tips for RMNP
Starting at about 9,475 feet at Bear Lake and climbing to roughly 10,220 feet at Lake Haiyaha, this hike takes place entirely at high altitude. We were already on day 4 of our Colorado trip by this point, so our bodies had some time to adjust. Here is what we recommend:
Before the hike:
- Give yourself time to acclimate. If you are coming from lower elevations, try to arrive in Colorado a day or two before attempting this hike. We had already spent several days at elevation before this, which made a noticeable difference.
- Skip alcohol the night before. It makes altitude symptoms worse.
- Download offline maps. Cell service is unreliable to nonexistent on most of this trail.
- Start early. You will feel better in the cooler morning temperatures. Afternoon thunderstorms are common in summer above 10,000 feet.
What to bring:
- Plenty of water: 2 to 3 liters per person minimum. The dry mountain air and altitude dehydrate you faster than you expect. We went through most of ours.
- Layers: Temperatures can vary 20+ degrees between the trailhead and higher elevations. We started in fleece and ended in T shirts.
- Sun protection: Sunscreen, hat, and sunglasses. Parts of the trail are fully exposed with no shade, and at this elevation the sun hits harder. Having a hat made a big difference on our hike.
- High energy snacks: Your body may crave salt and sugar at altitude. We brought granola bites and Honey Stingers, but trail mix, pretzels, or jerky work too.
- Trekking poles: Helpful for the rocky sections, boulder scrambling at Haiyaha, and any muddy or snowy patches.
- Portable oxygen: We packed ours and it came in handy. You can find cans at most gas stations and outdoor shops near the park.
- Bug spray: We used ours and were glad we had it. Bugs can be relentless near the lakes and in shaded sections of the trail.
- Bear spray and a bear horn: We brought both. Encounters are rare on this trail but worth having in bear country.
- Camera: You will want to capture these views.
- First aid kit and emergency supplies.
On the trail:
- Pace yourself. Take breaks, breathe deeply, and do not rush. Altitude sickness symptoms include headache, nausea, dizziness, and shortness of breath.
- Wear your hat. It was hot the day we hiked and the exposed sections are no joke at this elevation.
- Do not overpack your bag. I learned this the hard way. A heavy pack makes the ascent so much harder at this elevation. Bring only what you need and keep it light. Thankfully Jam took my bag without me even asking, husband goals.
- If you start feeling unwell, descend. Do not push through severe symptoms. The best remedy is to go back down.
Be a Good Steward of the Trail
These places are beautiful because people before us took care of them. Pack out everything you bring in, stay on marked trails, do not disturb wildlife, and leave every spot better than you found it. If you see trash on the trail, pick it up. The mountains give us so much. The least we can do is take care of them in return.

- And lastly, take your time and enjoy it. Hiking in the Rocky Mountains was one of the most breathtaking experiences of our lives, and not in a funny way because at 10,000 feet it quite literally takes your breath away. But there are moments on this trail where you stop, look around, and realize how small you are standing next to something this massive and ancient. It is humbling in the best way. It took us a little longer on the way down, and that is because I kept stopping to look back at where we just were. Do not rush past those moments. They are the whole point.
Best Time to Hike RMNP
We hiked this trail in early July and the conditions were great, though we did encounter snow and mud on parts of the trail. Here is what to expect by season:
Summer (June to August): Warmest and most crowded. Wildflowers peak in late July. Afternoon thunderstorms are common, so start early and aim to be off the trail by 2 PM. Timed entry required. Expect lingering snow on higher elevation sections through at least early July.

Fall (September to October): Fewer crowds, cooler temperatures, and stunning aspen colors in late September. Timed entry required through mid October. Snow can arrive anytime in October.
Winter and Spring (November to May): Trail requires snowshoes or microspikes. Much more challenging. Not recommended unless you are experienced in winter hiking.
Our Complete One Day RMNP Itinerary
Want to see this whole route mapped out? We built an interactive Wanderlog guide with every stop from this itinerary, the trailhead, all four lakes, the overlooks, and Estes Park. View the full itinerary on Wanderlog
Here is how we turned this hike into a full day Rocky Mountain National Park adventure:
3:00 AM — Departed our Vrbo on the west side of the park and drove through Trail Ridge Road in the dark toward Bear Lake
5:49 AM — Arrived at Bear Lake Trailhead, parked in the main lot, and started hiking
5:49 to 10:00 AM — Hiked to Nymph, Dream, Emerald, and Haiyaha Lakes with stops for photos and a full lunch at Haiyaha. Crossed Tyndall Creek between Nymph and Dream Lake.
10:00 AM — Stopped at Bear Lake for one last view of the mountains before heading back to the car
10:30 AM — Returned to car, changed clothes, and headed out of the park
11:00 AM — Stopped for the classic Rocky Mountain National Park sign photo (located on US 36 near the Beaver Meadows Entrance)

12:00 PM — Stopped in Estes Park. We walked around downtown along Elkhorn Avenue, grabbed a second bite to eat at Claire’s Restaurant and Bar (hiking makes you hungry) and recharged before the scenic drive back.
2:00 PM — Started the drive over Trail Ridge Road (US 34) from Estes Park back toward Grand Lake
2:00 to 4:30 PM — Stopped at popular Trail Ridge Road overlooks including Many Parks Curve Overlook, Rainbow Curve, Forest Canyon Overlook, and Alpine Visitor Center (at 11,796 feet). Watched for wildlife and took in the alpine tundra views.
5:00 PM — Arrived back at our Vrbo after an incredible day
Estes Park: The Perfect Post Hike Stop
After a long morning on the trail, we drove out of the park and into Estes Park, the mountain town just outside the east side entrances. It is only a few minutes from the park, and it was the perfect place to refuel and recharge before the drive back over Trail Ridge Road.

Stroll Down Elkhorn Avenue
Downtown Estes Park centers on Elkhorn Avenue, lined with shops, sweet treats and cafes, with the Riverwalk running just behind it. It is an easy, walkable place to stretch your legs after a big hike, with mountain views at the end of nearly every street.
Lunch at Claire’s Restaurant and Bar
After hiking to four alpine lakes, we were ready for a real meal, so we sat down at Claire’s Restaurant and Bar right downtown. It was exactly what we needed after the long day of hiking and before the scenic drive back to the west side.

Want to stay closer to the trails? Estes Park is the closest town to the Bear Lake Trailhead. Search stays on Vrbo or Expedia.
Trail Ridge Road: The Perfect Way to End the Day
We actually drove Trail Ridge Road twice in one day. The first time was at 3 AM in the dark on our way to the Bear Lake Trailhead. The second was in the afternoon, driving back from Estes Park toward our accommodations on the west side. Doing it this way meant we got to experience the full 48 mile stretch of the highest continuous paved road in the United States in completely different lighting, and the afternoon drive with all the overlooks was the perfect way to end the day.
Reservation Note
If you plan to drive Trail Ridge Road between 9 AM and 2 PM during peak season (May 22 through October 12, 2026), you will need a standard Timed Entry reservation ($2 per vehicle). If you already have a Timed Entry + Bear Lake Road reservation like we did, you are covered for the whole park, including Trail Ridge Road. If you enter outside the 9 AM to 2 PM window, no reservation is needed for this area.
Trail Ridge Road Stops
Many Parks Curve Overlook: The first big pullout on the drive, a hairpin turn with sweeping views across Horseshoe Park, Moraine Park, and Estes Park below the Mummy Range.
Rainbow Curve One of the best overlooks once you’re above tree line, good spot to feel the elevation shift.

Forest Canyon Overlook A short walk from the parking area takes you to a dramatic view down into Forest Canyon. The scale of the canyon is hard to capture in photos but worth trying. Keep a look out too because you might just spot a marmot like we did. They are the cutest and they blend right into the rocks so you really have to pay attention.


Alpine Visitor Center (11,796 feet) The highest visitor center in the National Park system. We stopped here for restrooms, the gift shop, and to take in the alpine tundra views. It is also the best spot to feel just how high you actually are.

Trail Ridge Road: What You Need to Know
Road Status: Typically open late May through mid October (weather dependent). Call (970) 586 1222 for current status.
Drive Time: Plan 2 to 3 hours with stops. 48 miles between Estes Park and Grand Lake.
Not for the Faint of Heart: Parts of the road have steep drop offs with no guardrails and sharp curves at high elevation. If you are uncomfortable with heights or narrow mountain roads, prepare yourself. Drive slowly and stay focused.
Layers: It can be 20+ degrees colder at the Alpine Visitor Center than in Estes Park. Bring a jacket even if it feels warm at the base.
Gas: Fill up before entering the park. There are no gas stations inside RMNP.
Wildlife: Elk, bighorn sheep, and marmots are commonly spotted along the road. Keep your eyes open and your camera ready.
Do Not Rush: Pull over at designated overlooks to enjoy the views. This is not a road you want to speed through.
Alpine Visitor Center: Located at Fall River Pass (11,796 feet) with restrooms, exhibits, a gift shop, and a snack bar. The highest visitor center in the National Park system.
Parking and Shuttle Options at Rocky Mountain National Park
We arrived at the Bear Lake lot at 5:49 AM and scored a parking spot, but here are all your options:
Bear Lake Parking Lot: The most convenient option but fills up fast. Arrive before 6 AM in summer, or use the shuttle.
Park and Ride + Shuttle: Park at the Park and Ride lot off Bear Lake Road and take the free shuttle to Bear Lake. Shuttles run frequently and are a stress free option if the Bear Lake lot is full.
Glacier Gorge Trailhead: An alternate starting point that accesses similar trails. Also fills quickly.
Why This Makes a Perfect One Day RMNP Itinerary
This itinerary gave us the best of Rocky Mountain National Park in one day: an incredible alpine lake hike, the iconic park sign photo, time to explore Estes Park, and the unforgettable scenery of Trail Ridge Road. Starting on the west side and driving through the park before our hike let us experience RMNP from both sides.
If you are planning a Colorado road trip or visiting RMNP for the first time, we highly recommend this route. The variety of landscapes, from subalpine forest to alpine tundra, combined with the accessibility of the trail, make this one of the best ways to experience the park in a single day.
You Might Also Like

National Park
3 Day Rocky Mountain National Park Itinerary from Estes Park

Hike
Sky Pond Hike in Rocky Mountain National Park Guide

Colorado
Pet Friendly Colorado Springs Guide

National Park
Black Canyon of the Gunnison with a Dog: A Pet Friendly National Park Guide

Colorado
Ouray Perimeter Trail: Stunning Dog Friendly Hike in Colorado

Colorado
Bishop Castle and Lake Isabel: 2 Stops That Make the Perfect Colorado Day Trip
Everything you need to pack for a pet friendly road trip, from snacks and gear to must-have items for your pup. Sign up below to get it free.
Free Download
Get the Free Printable Road Trip Checklist
It is completely free. Just drop your email below and we will send it straight to your inbox. Check off what you already have, shop what you still need, and hit the road completely ready.



Leave a Reply